- Contents
Liquid Latitude Help
Add a Queue Level
Use the Queue Levels panel to add a queue level.
To add a queue level
-
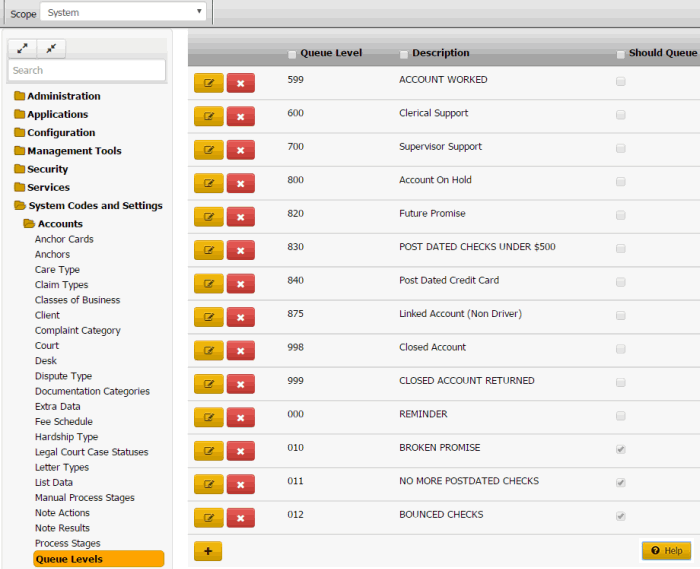
In the Navigation pane, click System Codes and Settings > Accounts > Queue Levels.

-
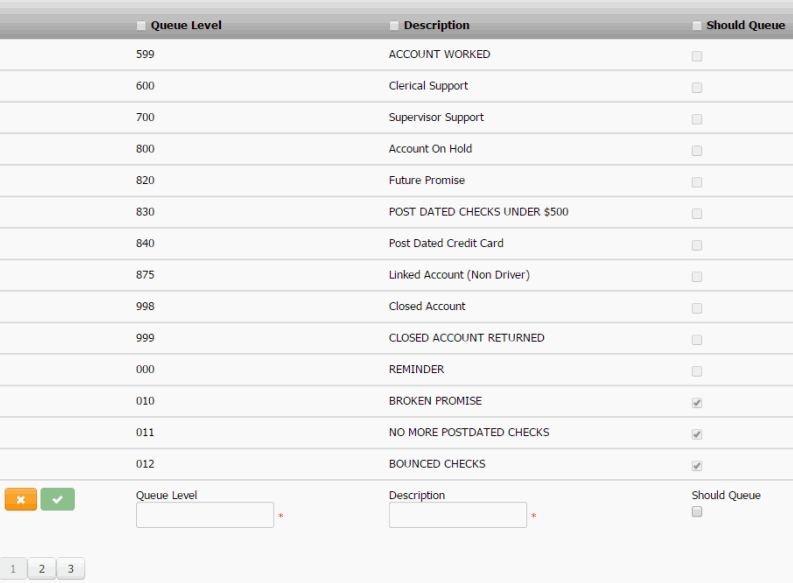
Click the plus sign (+). A blank row appears in the data grid.

Queue Level: Unique three-digit code that identifies the queue level.
Description: Description of the queue.
Should queue: If selected and the queue level is between 600-799 (clerical or supervisor), accounts assigned to this queue appear in the users' queue. If the user has the Accounts – Change Continue Queuing permission, you can override this setting when assigning an account to a support queue.
-
Complete the information and then click the check mark.


