- Contents
Job Manager Help
Create a Job Configuration
Use the Job - [Job Configuration Name] tab to create a job configuration to automate a manual process (for example, AIM file import, Exchange file export).
To create a job configuration
-
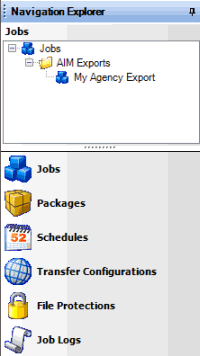
In the Navigation Explorer pane, click Jobs. The Jobs panel appears.

-
To create a folder for the new job, do the following:
-
Right-click Jobs, click Add, and then click Add Folder.
-
Type a name for the folder and then press Enter.
-
Right-click the folder where you want to add the job, click Add, and then click Add Job.
-
Type a name for the job and then press Enter.
-
Do one of the following:
-
Right-click the job and then click Job Properties.
-
Double-click the job.
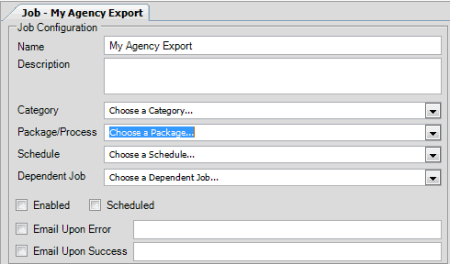
The Job - [Job Configuration Name] tab appears. Job Manager includes the name of the job configuration in the tab name.

Name: Name of the job configuration as specified in the Jobs panel. To modify the name, rename it in the Jobs panel.
Description: Description of the job configuration.
Category: Job configuration category. For more information, see Job Categories.
Package/Process: Package or process to automate. The values that appear are based on the specified job configuration category.
Schedule: Schedule for running the job.
Dependent Job: Job that has to complete before this job can start. Not all jobs have a dependent job.
Enabled: Job that runs after the current job completes successfully. Not all jobs have a dependent job.
Scheduled: If selected, the schedule is active for the job. If cleared, Job Manager prevents the job from running.
Email Upon Error: If selected, Job Manager sends an email message to the specified email addresses when errors occur during processing.
Email Upon Success: If selected, Job Manager sends an email message to the specified email addresses when processing completes successfully.
Note: To specify more than one email address, use a semi-colon to separate the email addresses.
-
Complete the information and then, in the toolbar, click Save.


