- Contents
AIM Receiver Help
Add a Client
Use the Client Configuration window to add a client. Once you add a client, you can configure the client's settings.
To add a client
-
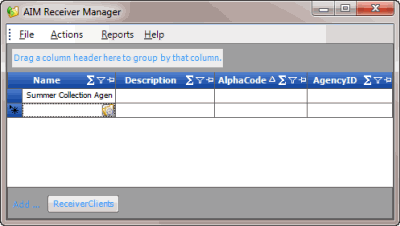
In the lower section of the AIM Receiver Manager window, click ReceiverClients. AIM Receiver Manager adds a blank row to the data grid.

-
In the Name column of the data grid, click the Client icon. The Client Configuration window appears.

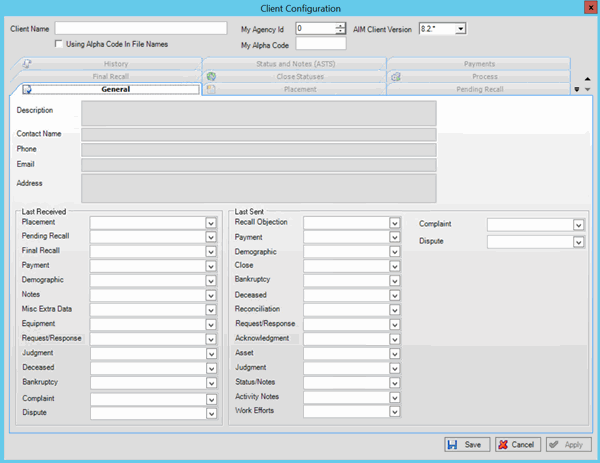
Client Name: Name of the client who is outsourcing accounts to your organization.
My Agency ID: Unique numeric code that the client assigned to your organization for identification purposes.
AIM Client Version: The version of AIM that your client uses.
Using Alpha Code in File Names: If selected, AIM Receiver Manager includes the value in My Alpha Code when naming the import and export files.
My Alpha Code: Unique alphanumeric code that the client assigned to your organization. The client uses this code to label the folders that contain your import and export files.
-
In the upper section of the window, complete the information and then click Apply.
-
Proceed to configure the client.
-
After you configure the client, click Save. AIM Receiver Manager adds the client to the data grid in the AIM Receiver Manager window.


