- Contents
Exchange Manager Help
Specify Data to Include in Export
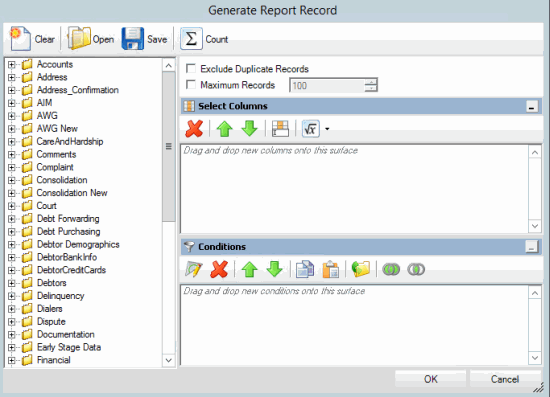
Use the Generate Report Record window to specify the data to include in the export and the conditions that limit the records to include.
To specify data to include in the export
-
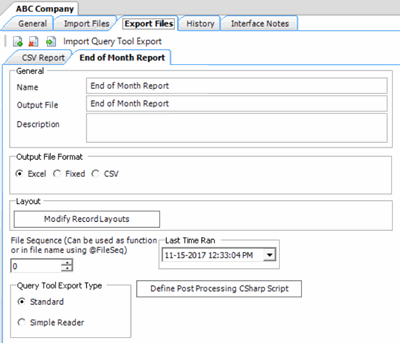
Click the [Export Layout Name] tab on the Export Files tab (for example, End of Month Report).
-
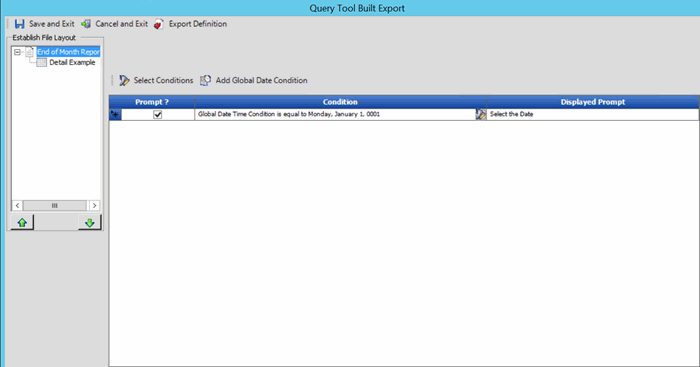
Click Modify Record Layouts. The Query Tool Built Export window appears.
-
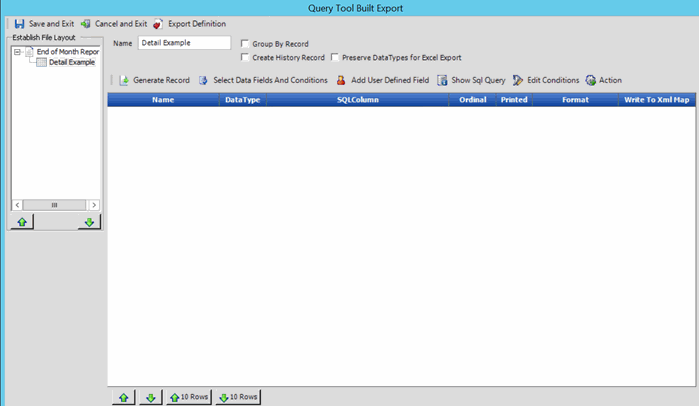
Click the name of the detail record (for example, Detail Example). Information for the detail record appears.
-
Above the data grid, click Select Data Fields And Conditions. The Generate Report Record window appears.
Note: For information about using queries, see Queries.
-
Specify the columns to include in the detail record and the conditions for selecting records to include and then click OK. The columns and conditions appear in the data grid in the Query Tool Built Export dialog box.
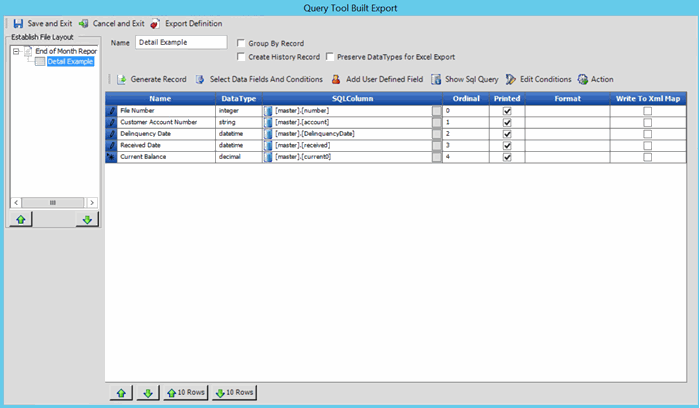
Name: Name of the query column.
DataType: Type of data (for example, integer or string).
SQLColumn: SQL table and field name. If you switch a value, the SQL code for switching values appears also.
Ordinal: Position in the export file to place the field.
Printed: If selected, Exchange Manager includes the field in the export file.
Format: Format to which to export the data.
UseQualifier: If selected, Exchange Manager places a qualifier around the field to signify the start and end of the field. Exchange Manager uses the character you specified on the [Export Name] tab. For more information, see Create an Export File Layout Using the Query Tool.
GroupingConstruct: Value to calculate for the records in each group (for example, number of records in each group). This column appears when you select the Group By Record check box.
Write to Xml Map: If selected, Exchange Manager writes the data to an XML file.
-
To change the position in which a field appears in the export file, do the following:
-
To move a single field, click the row and then click the up or down arrow at the bottom of the window.
-
To move multiple sequential fields, click the first row; hold down the Shift key; click the last row; release the key; and then click the up or down arrow at the bottom of the window.
-
To move multiple non-sequential fields, click each row while holding down the Ctrl key; release the key; and then click the up or down arrow at the bottom of the window.
-
To move one or more fields up or down 10 positions, click the individual; sequential; or non-sequential rows to move, and then click the up 10 Rows or down 10 Rows down arrow at the bottom of the window.
-
To switch a value in the source file to another value when exporting the data, do the following:
-
-
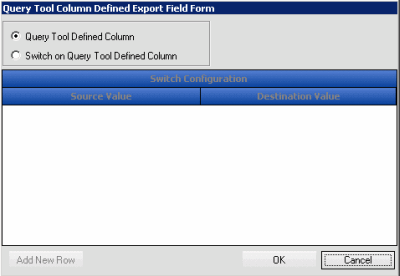
Next to the value in the SQLColumn cell of the data grid, click the gray box. The Query Tool Column Defined Export Field Form dialog box appears.
-
-
-
Click Switch on Query Tool Defined Column and then click Add New Row. The data grid appears in edit mode.
-
In the Source Value box, type the value as it exists in the Latitude table.
-
In the Destination Value box, type the value to which to change the source value when exporting it and then click OK. Exchange Manager displays the SQL code in the SLQColumn cell of the datagrid.
-

-
To include a field in the export file, select the Printed check box in the data grid. To exclude a field, clear the check box.
-
To specify the format for a field (for example, currency format for an integer data type), in the Format list box in the data grid, click the format.
Note: Exchange Manager doesn't validate the format so if you choose the wrong format for the data type, an error occurs when you attempt to export the file.
-
To have Exchange Manager place a qualifier around a field, select the corresponding UseQualifier check box in the data grid.
-
If you selected the Group By Record check box, in the GroupingConstruct list box in the data grid, do one of the following:
-
To count the number of records in each group, click Count.
-
To calculate the maximum value (for example, highest current balance) for the records in each group, click Max.
-
To calculate the minimum value (for example, lowest current balance) for the records in each group, click Min.
-
To calculate the total (for example, total current balance) for the records in each group, click Sum.
-
To include a field in an XML file, select the Write to Xml Map check box in the data grid. To exclude a field, clear the check box.
-
To remove a field from the export, click the row in the data grid and the press the Delete key. In the confirmation dialog box, click Yes.
-
Click Save and Exit.
-
In the Clients pane toolbar, click Save. The Update Comment dialog box appears.
-
In the Update Comment box, type a comment regarding your changes and then click OK.


