- Contents
Invoices Help
Generate an Invoice for a Specific Customer
Use the Invoice Options dialog box to specify what information to include on the invoice and then generate the invoice for a specific customer. Before generating invoices, confirm that you processed all payment batches.
Note: For customers associated to a parent customer (subsidiaries), The Invoices program only generates invoices for the parent customer.
To generate an invoice for a specific customer
-
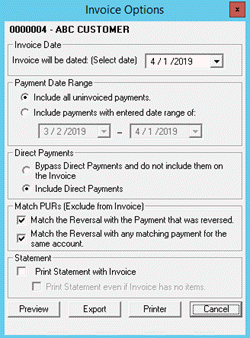
In the Invoices window, in the Navigation pane, right-click a customer and then click Invoice Customer. The Invoice Options dialog box appears, with the customer name and number at the top.

Invoice will be dated: Date to appear on the invoice. The date defaults to the current date. To change the date, click the arrow and then click a date in the calendar.
Include all uninvoiced payments: If selected, the invoice includes all payments that your organization hasn't invoiced.
Include payments with entered date range of: If selected, the invoice only includes payments and adjustments within the specified date range that your organization hasn't invoiced. Specify the date range or accept the default, which includes all payments and adjustments since your organization last created an invoice for this customer. The first box is the beginning date and the second box is the ending date.
Bypass Direct Payments and do not include them on the invoice: If selected, the invoice doesn't include payments made directly to the customer.
Include Direct Payments: If selected, the invoice includes payments made directly to the customer.
Match the Reversal with the Payment that was reversed: If selected, the invoice doesn't include reversals that the Invoices program matches to a reversed payment.
Match the Reversal with any matching payment for the same account: If selected, the invoice doesn't include reversals that the Invoices program matched to any matching payment for the same account.
Note: If you select both check boxes, the Invoices program matches the reversal to the reversed payment as long as your organization hasn't invoiced the reversed payment. If your organization invoiced the reversed payment but hasn't invoiced the make-up payment, the Invoices program matches the reversal to the make-up payment. If you clear both check boxes, the invoice includes all payments and reversals.
Print Statement with Invoice: If selected, the Invoices program prints a customer statement along with the invoice.
Print Statement even if Invoice has no items: If selected and the invoice doesn't have any line items, the Invoices program prints a customer statement. If cleared and the invoice doesn't have any line items, the Invoice program doesn't print a statement.
-
Complete the information.
-
To preview the invoice, do the following:
-
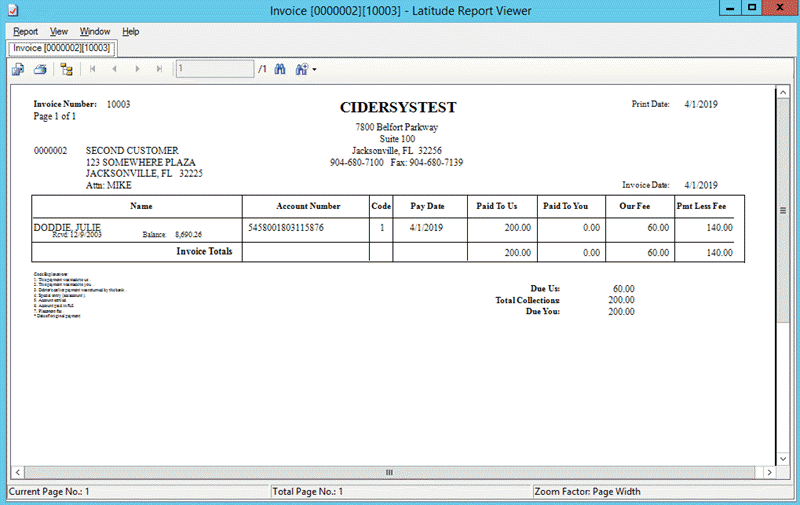
Click Preview. The invoice displays in the Invoice [Customer Code][Invoice Number] - Latitude Report Viewer window.

Note: This window provides several options, such as exporting and printing. For more information, see Report Viewer.
-
Close the window.
-
To export the invoice, do the following:
-
In the Invoice Options dialog box, click Export. The Browse For Folder dialog box appears.
-
Select the folder to save the file to and then click OK. The file naming convention is, "Invoice [Customer] [Invoice Number]". If you selected the Print Statement with Invoice check box, the Invoices program generates a statement also. The file naming convention is, "Statement [Customer] [datetime stamp]".
-
To print the invoice, do the following:
-
In the Invoice Options dialog box, click Printer. The Print dialog box appears.
-
Select a printer and then click Print.
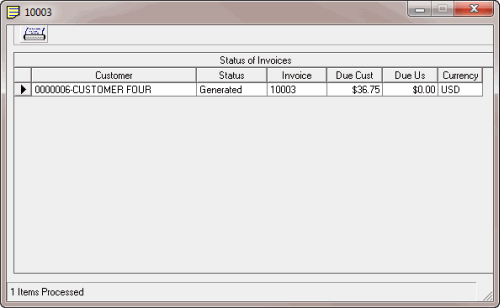
When you are finished previewing, printing, or exporting the invoice, the Status of Invoices window appears.

-
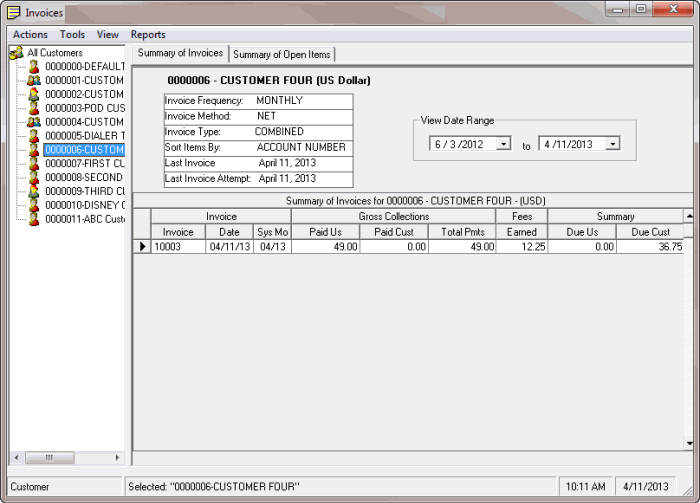
Click the X to close the window. The Invoices program updates the Summary of Invoices tab in the Invoices window to include the invoicing information.

-
To view summary information for an individual customer, in the Navigation pane, click the customer.


