- Contents
Latitude Help
Select an Account from Inventory
Use the Inventory panel to view accounts assigned to you and then select an account to display in the Work Form.
To select an account from inventory
-
If the Search & Queue Selection panel isn't visible, click the Search slide-in icon. The Search & Queue Selection panel appears.
-
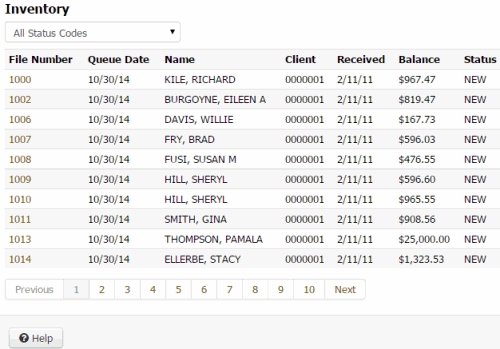
In the menu bar, click Inventory. The Inventory panel appears.

Filter: Account status for which to display accounts. If you select All Status Codes, all accounts assigned to you display, regardless of account status.
File Number: Unique code that the system assigned to identify the account.
Queue Date: Date the system or a user assigned the account to the queue.
Name: Name of the customer associated to the account.
Client: Number that identifies the client associated to the account.
Received: Date your organization received the account.
Balance: Account balance.
Status: Status of the account.
-
In the Filter list box, click a status code for which to display accounts.
-
In the File Number column, click the account. The following outcomes are possible:
-
If your organization requires you to validate information with the caller before displaying the account, the Data Protection dialog box appears. Verify the information with the caller and then click Validated. If you click Not Validated, the system doesn't display the account.
-
If there are warnings for the account, the Warnings dialog box appears. Review the warnings and then click OK.
-
The account appears in the Work Form.


