- Contents
Latitude Console Help
Hide or Show Linked Accounts Columns
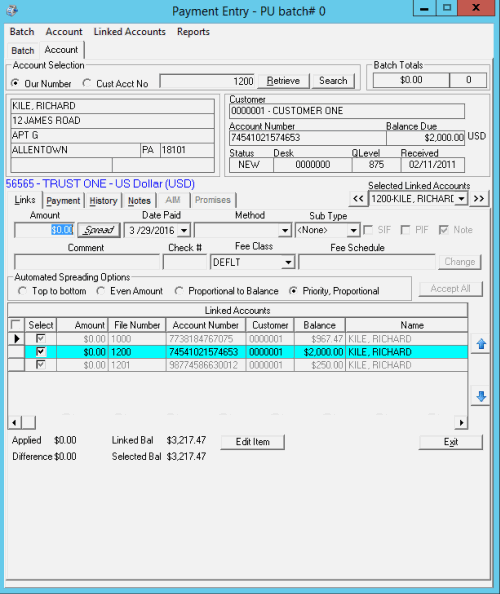
Use the Grid: Linked Accounts dialog box to show or hide columns in the Linked Accounts data grid on the Links tab.
To show or hide linked accounts columns
-
In the Main Menu window, from the Apps menu, click Payment Entry. The Payment Entry window appears.
-
Do one of the following:
-
If you know the file or account number, do the steps to Retrieve an Account by Account Number.
-
To search for an account using simple search, do the steps to Search for an Account Using Simple Search.
-
To search for an account using advanced search, do the steps to Search for an Account Using Advanced Search.
-
On the Account tab in the Payment Entry window, click the Links tab.

-
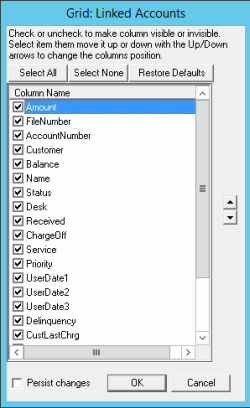
Right-click in the data grid and then click Customize. The Grid: Linked Accounts dialog box appears.
Note: Selected check boxes appear as columns in the data grid on the Links tab; cleared check boxes do not.

-
Do one of the following:
-
To select all check boxes, click Select All.
-
To clear all check boxes, click Select None.
-
To restore the check boxes to the default selections, click Restore Defaults.
-
To select specific check boxes, select or clear the individual check boxes.
-
Do one of the following:
-
To apply the selections to the current session and future sessions, select the Persist Changes check box.
-
To apply the selections to the current session only, clear the Persist Changes check box.
-
Click OK. The system closes the dialog box and updates the data grid on the Links tab.
Related Topics


