


- Contents
Interaction Connect Help
Co-browse view
Requirements: You need the Customize Client Security right to add views. See Co-browse for requirements for the Co-browse feature.
You join a Co-browse session by clicking the Co-browse sidebar button after a visitor to your company's website provides you with a Co-browse session code. For more information, see Use Co-browse during an interaction.
Display the Co-browse view
You add the Co-browse view to your CIC client as you would any other view. It is available on the Quick Picks list and in the Add Views dialog box. For instructions, see Add or Close Views. As with any other view, you also control where the view appears in your CIC client. For more information, see Change View Layout.
Co-browse sidebar and view
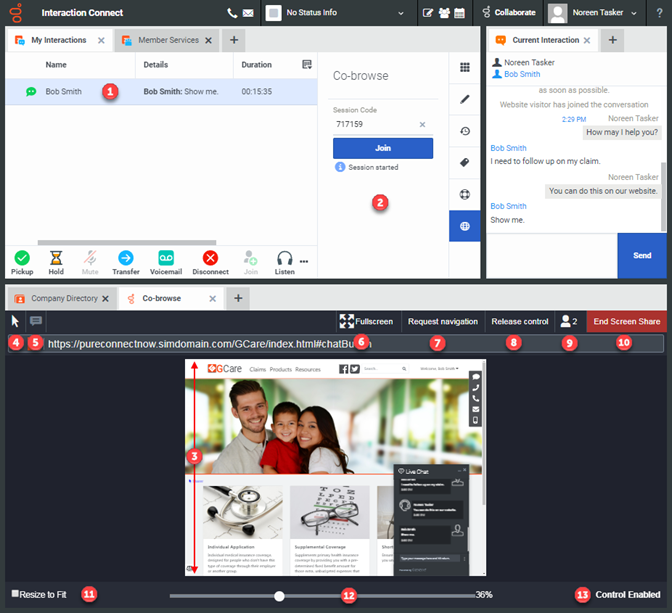
The Co-browse sidebar enables you to join a Co-Browse session. You can see the visitor's view of your company's webpage. You can interact with the webpage to point the website visitor to information or guide them in resolving an issue.
|
1 |
Selected interaction |
To join a Co-browse session, you must have a selected and connected interaction. |
|
2 |
To enter the Co-browse session code and join the Co-browse session, use the Co-browse Sidebar. |
|
|
3 |
Co-browse view |
After you join the Co-browse session, the visitor's webpage appears in your Co-browse view. See also Sidebar. |
|
4 |
Pointer |
To indicate specific parts or controls in the visitor's webpage, use the pointer The visitor sees a cursor and your name on the webpage. Note: You also see the visitor's name and cursor in your Co-browse view. |
|
5 |
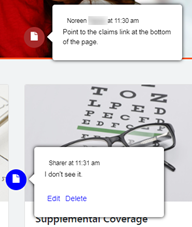
Annotation |
To display text directly on the visitor's webpage, click the Annotation icon. You can position the annotation anywhere on the webpage. The visitor has a similar control and can ask questions or respond. You and the visitor see all annotations made on this webpage.
|
|
6 |
Fullscreen |
This control does not apply to the Co-browse view in Interaction Connect. |
|
7 |
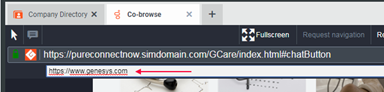
Request navigation |
To ask the website visitor to let you change to a different webpage, click this control and enter a URL when prompted.
The website visitor can allow or deny you the ability to navigate to a different webpage. |
|
8 |
Request
Control |
To ask the website visitor to let you control the webpage view, click Request Control. To enable you to take control, the visitor must click an Allow button in the visitor's Co-browse toolbar. If you have control, you can relinquish it by clicking Release Control. |
|
9 |
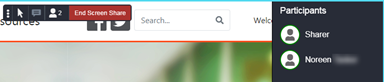
Participants |
Other agents or supervisors can join a Co-browse session. To display the names of all the participants in the Co-browse session, click this control.
|
|
10 |
End Screen Share |
To end your participation in the co-browse session, click this control Note: The website visitor can also end the co-browse session at will. |
|
11 |
Resize to Fit |
This control does not apply to the Co-browse view in Interaction Connect. |
|
12 |
Magnification slider |
Adjust the magnification of the webpage view. |
|
13 |
View-only Mode or Control Enabled |
View-only Mode indicates that the website visitor is in control of the webpage. Control Enabled indicates that you are in control of the webpage. |
Website Visitor's Co-browse toolbar
During a Co-browse session, the website visitor sees a webpage toolbar that is similar to the controls available your Co-browse view. The visitor has the same Pointer, Annotation, Participants, and End Co-browse controls.

|
1 |
Move |
The visitor uses this control to drag and drop the Co-browse toolbar in another location on their view of the webpage. |
|
2 |
End Screen Share |
The website visitor can end the Co-browse session at any time. |