- Contents
Interaction Administrator Web Edition Help
Workgroup: Configuration
The Configuration details tab contains general information, wrap-up codes, audio files, security and keyword sets configuration for the user. Click the name of the details tab for field descriptions.
Note: If you enabled the Enhanced Interaction Administrator Change log, then all of your changes on this tab are tracked in that log. For more information, see About the Enhanced Interaction Administrator Change Log.
To complete the workgroup's configuration information:
-
Click the Configuration details tab to display the details view.
-
Complete the following information in the first section:
-
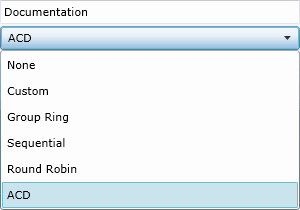
Select the Queue type from the drop-down list.

-
Depending on the workgroup type, enter the Extension.
-
-
Select the Preferred Language. You can filter the list by typing in the drop-down box.

-
To display the access control groups membership available, click the icon.

and select the Access Control Group from the list to assign to the workgroup. -
To record interactions routed through this workgroup, select Record all Interactions in this workgroup.
Notes: The workgroup administrator receives a voice mail of all recorded interactions. Each recording includes the secure audio recording of whatever the user said in the IVR. The DTMF tones are replaced with static values, but the caller's words can be heard.
Do not select this check box if you use Interaction Recorder. -
-
Important: CIC saves a copy of each recording on the Media Server. CIC does not delete these recordings . To ensure that your Media Server does not run out of space, use a content management system, such as Recorder or a third-party utility, to delete the recordings or to archive them to a long-term storage location.
-
To activate and use this workgroup, select Workgroup is active.
-
-
Click Mailbox section expander to display (or hide) the mailbox section's contents, and complete the following information:
-
Click Assign a new mailbox to open the Assign Mailbox dialog box.
-
Click the mail type.
-
Type the Display Name.
-
If you select Interaction Message Store, complete this information:
-
-
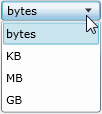
Click on the radio button to select the Storage Size. If Limit to: is selected, use the up and down arrows to set the size or type in the text box, and select the units from the drop-down box.

-
Click the radio button to select the Number of Messages. If Limit to: is selected, use the up and down arrows or type in the text box to set the number.
-
-
If you select Exchange, search for an existing Exchange mailbox.
-
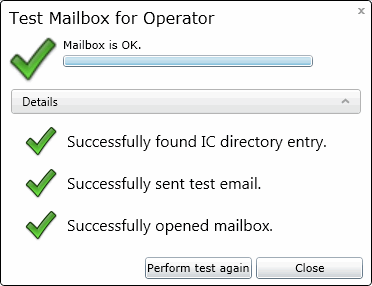
Click Test mailbox to open the mailbox test.

-
-
Click Wrap-up Codes section expander to display (or hide) the wrap-up codes section's contents, and complete the following information:
-
-
Select Use Wrap-up Codes if wrap-up codes can be used for this workgroup. If enabled, at least one wrap-up code must be specified:

-
Click
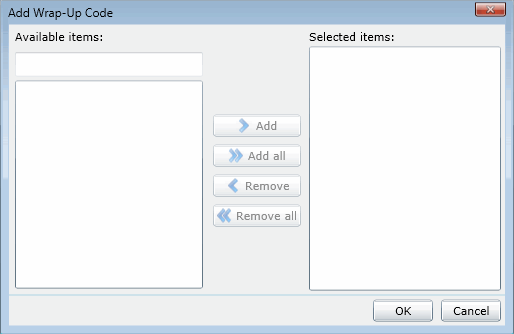
 to open the Add Wrap-Code dialog box:

Select one or more codes in the Available items list, and click Add to add the code(s) to the Selected items list. You can also click Add all to add all codes. To filter the list of codes, type in the filter field above the list.
-
-
Use the up and down arrows or type in the number to set the Keypad Wait Time (seconds).
-
-
Use the up and down arrows or type in the number to set the Client Wait Time (seconds).
-
Enter the Prompt name or accept the default.
-
-
Click the Audio Files section expander to display (or hide) the audio files section's contents, and complete the following information:
-
-
Type in the Voicemail message or accept the default.
-
Type in the On-hold message or accept the default.
-
Select the type of On-hold music to be played to the caller. If Use wave file is selected, type the file name or accept the default. If Use audio source is selected, use the drop-down menu or type in the name of the audio source to play.

To set the duration of the music, select the Audio duration (seconds) check box and use the up and down arrows or type in the number to set the seconds.
-
-
Click the Security section expander to display (or hide) the security section's contents, and complete the following information:
-
If members of this workgroup are master administrators, select the Is a master administrator check box.
-
Note: Only a master administrator can select this check box. See the field descriptions for more information.
-
-
To allow members of this workgroup to edit administrator rights, select the Can edit administrative rights check box.
-
To allow members of this workgroup to edit access control rights, select the Can edit access control rights check box.
-
-
Click the Interaction Analyzer Keyword Sets section expander to display (or hide) the keyword sets section's contents, and complete the following information:
-
Select the Customer and/or Agent check boxes to enable a keyword set.

-
-
Save the new workgroup or modified workgroup.

If necessary, the new workgroup or changes made to an existing workgroup can be reverted.

Related Topics
Workgroup: Administrative Rights


