


- Contents
Interaction Supervisor Help
Workgroup Details view
Summary
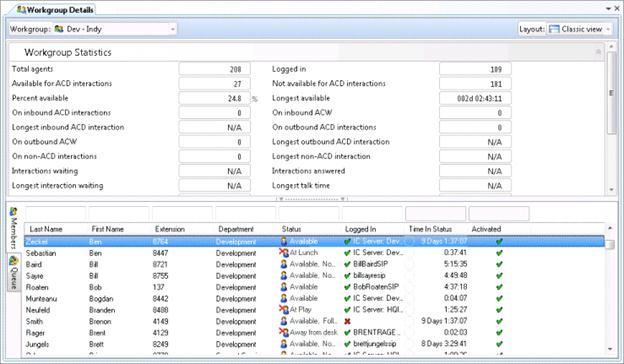
A Workgroup Details view displays details about a selected workgroup. It displays the status of individual workgroup members, including the length of time in status and their logged in state. It shows workgroup statistics, members of the workgroup directory, and if applicable, interactions in the workgroup queue.
The ability to filter skills is not always visible in this view. Skill filtering is unavailable if:
-
You are connected to an older server that does not support skill filtering.
-
No Statistic Parameter Group has been assigned to the workgroup.
-
No Skill Categories have been assigned to the Statistic Parameter Group with which the workgroup is associated.
-
When any of these factors apply, the skills filter section is not visible to maintain backwards compatibility.
Add this view
-
Logon to IC Business Manager if you have not done so already.
-
Select an existing workspace from the Workspaces tab, or create a new workspace to host the view.
-
Select New > View from the File menu.
The Create New View dialog appears, listing views by category or product. Licensing and station rights determine the availability of selections.
-
Select Categories from the Group By drop list.
-
Select the Agents and Workgroups view category.
-
Select Workgroup Details from the list of views. Click OK. Select one workgroup, if necessary after typing in the text box to filter by name.
-
Click Finish.
Change the layout of this view
The Layout drop list (top right) changes the orientation of controls in the view. The layout options are Classic View, Interactions queue at the top, Interactions queue at the bottom, and 3 column view.
Classic view The default "Classic View" positions expanders for statistical categories above a list of workgroup members. Note that there are two tabs: the Queue tab shows objects in the interactions queue, (if the workgroup has a queue) with call action controls so that the user can select a queue object, and then listen, coach the agent, record the conversation, join a conference, or perform basic telephony operations. The user must log in to a station to use the call action controls. The Members tab lists members in a queue control. |
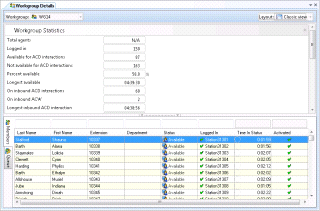
Interactions queue at the top When "Interactions queue at the top" is selected, the list of interactions appears above workgroup statistics and member lists. |

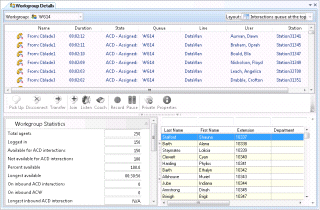
Interactions queue at the bottom When "Interactions queue at the bottom" is selected, the list of interactions appears below workgroup statistics and member lists. |
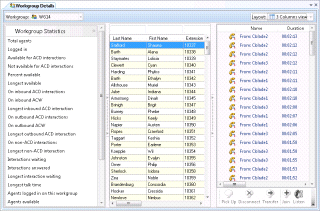
3 column view The 3 column view maximizes vertical space by arranging lists horizontally adjacent to one another. |
Shortcut commands in this view
The table below shows shortcut commands available when you right-click each list.
|
List |
Shortcut Command |
Description |
|---|---|---|
|
Workgroup Statistics |
Edit alerts… |
See Manage Alerts. |
|
Remove > Remove entire statistic group |
Removes an entire category of statistics from the view at once. |
|
|
Remove > Remove statistic |
Removes a single statistic. |
|
|
Add/Remove Statistics |
||
|
Help |
Displays description of the statistic in the Statistic Help dialog. |
|
|
Workgroup Members |
Edit alerts… |
See Manage Alerts. |
|
Manage Workgroup activations |
Opens the Manage Workgroup Activations dialog, used to activate or deactivate workgroup agents. |
|
|
Manage User activations |
Opens the Manage User activations dialog, used to activate a single agent on multiple workgroups. |
|
|
Logout [user] |
If your CIC administrator has granted you the right, you can log off another user. For more information, see Force User Logouts. |
|
|
Formatting Options |
Opens the Workgroup Directory Options dialog, used to format rows for a list of members in a workgroup directory. |
|
|
Properties |
Opens properties of the selected user in the Directory Properties dialog. |
|
|
Change Status for |
If your CIC administrator has granted you the right, you can set another user's status. Opens the Change User Status dialog. |
|
|
Workgroup Interactions |
Pick Up |
Answers the current interaction, or takes the interaction off hold. |
|
Disconnect |
Disconnects the selected interactions. You can select multiple calls to disconnect at once. |
|
|
Transfer |
Transfers the interaction to another user. |
|
|
Join |
Adds the Supervisor user to a call on any user or station queue that the manager has permission to monitor. Both the agent and the customer can hear the manager's side of the conversation. When the Join feature is used, Interaction Supervisor creates a conference call between the agent, the connected party, and the Supervisor user. |
|
|
Listen |
Listens in on a call. For example, you can listen to a caller leaving a voice mail message, to a conversation between two parties, or to a conference call. The parties being listened to may not be aware that someone is listening to the call. Genesys disclaims any responsibility for end-user or licensee to comply with federal or state law restrictions regarding Record or Listen capabilities of CIC software. The licensee hereby warrants and represents that the end-user or licensee will use the product in compliance with any federal or state law. |
|
|
Coach |
Adds yourself to an agent's call on any user or station queue you have permission to monitor. This enables you to provide advice to the agent without the customer knowing that you are assisting on the call. The agent can hear your side of the conversation, but the customer cannot. This feature is especially helpful to supervisors who are training new agents, monitoring employee customer service performance, or simply providing assistance with a customer call. If the agent presses the Mute button while you are coaching the agent, the customer no longer hears the agent but the agent can continue to converse with you. The Mute button does not affect the audio between the agent and the coach. You must have permission to use the Coach feature and you must have permission to monitor queues. If you have questions about your rights and permissions, see your Interaction Center administrator. The Coach option is disabled if the call is not in a state in which this action can be performed. |
|
|
Record |
Records the currently selected call. This recording is saved as a .wav file. Selecting Record the first time starts the recording session for a call. Selecting Record again stops the recording session for a call. If you select Record more than once to stop or continue recording a call, each part of the recorded conversation is stored in separate .wav files, and sent to you in e-mail message attachments after you end the call. The Record option is unavailable if the call is not in a state in which this action can be performed or if you do not have rights to record calls. Contact your CIC administrator if you need security rights to use this feature. Genesys disclaims any responsibility for end-user or licensee to comply with federal or state law restrictions regarding Record or Listen capabilities of CIC software. The licensee hereby warrants and represents that the end-user or licensee will use the product in compliance with any federal or state law. |
|
|
Pause |
Pauses recording. Select Pause again to resume recording. |
|
|
Private |
Prevents other users from recording or listening to a conversation. Use of the Private feature may be subject to your company's policies and should only be used in accordance with those policies. CIC handler customization can be used to track the use of the Private feature to ensure compliance with such policies. |
|
|
Properties |
Opens properties of the selected user in the Directory Properties dialog. |
|
|
Copy value of |
Copies the value of the selected row at the intersection of the selected column, to the clipboard. |
|
|
Copy Interaction |
Copies details to the clipboard. Example: Name: "From:Cblade2" Duration: "00:01:57" State: "ACD - Assigned: user2673" Queue: "WG14" Line: "DataVlan" User: "Thompson, Kenith" Station: "Station32673" |
|
|
Agent Keywords |
Displays list of keywords in the Agent Score queue column. See Interaction Analyzer Columns in Queue Controls. |
|
|
Customer Keywords |
Displays list of keywords in the Customer Score queue column. See Interaction Analyzer Columns in Queue Controls. |
Change statistics in this view
-
Right-click in the view to display the shortcut menu.
-
Choose Add/Remove statistics…
-
Use the Workgroup Statistics dialog to select which time intervals and statistics appear in the view. Click OK.
Select cumulative vs. Partial Sum histogram for Service Level or Abandon Rate statistics
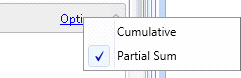
Click Options on the right side of the expander to select histogram type.
Think of cumulative distribution as an accumulative bucket for the workgroup, interaction type, and time interval including current period, current shift, and so on. An accumulative bucket means that each bucket includes the count for all of the preceding buckets. In a partial sum distribution, each bucket count is exclusive of any other bucket.
-
Cumulative alters the reporting interval to summarize interactions in the first n seconds. For example:
- 0-10 seconds - Interactions abandoned/serviced in the first 10 seconds.
- 0-20 seconds - Interactions abandoned/serviced in the first 20 seconds.
- 0-30 seconds - Interactions abandoned/serviced in the first 30 seconds.
- 0-40 seconds - Interactions abandoned/serviced in the first 40 seconds.
and so on.
-
Partial Sum summarizes interactions abandoned or serviced in particular intervals. For example:
- 0-10 seconds - Interactions abandoned/serviced in the first 10 seconds.
- 10-20 seconds - Interactions abandoned/serviced between 10 and 20 seconds.
- 20-30 seconds - Interactions abandoned/serviced between 20 and 30 seconds.
- 30-40 seconds - Interactions abandoned/serviced between 30 and 40 seconds.
and so on.
Display Help for a statistic
-
Right-click the statistic to display the shortcut menu.
-
Select Help. The description of the statistic appears in the Statistic Help dialog.
Set Alerts
See Manage Alerts.