


- Contents
Interaction Administrator Web Edition Help
User: General
The General details tab contains basic information, mailbox, membership, security and password policy configuration for the user. Click the name of the details tab for field descriptions.
Note: If you enabled the Enhanced Interaction Administrator Change log, then all of your changes on this tab are tracked in that log. For more information, see About the Enhanced Interaction Administrator Change Log.
To complete the user's general information:
-
Click the General details tab to display the details view.
-
Complete the following information in the first section:
-
Type the User ID.
Notes:
Do not use these characters: \ / : * < > |
Do not exceed 64 characters.
-
Type the Extension.
-
-
Select the Preferred Language. You can filter the list by typing in the drop-down box.

-
Select the Station. You can filter the list by typing in the drop-down box.

-
To display the access control groups membership available, click the icon.

and select the Access Control Group from the list to assign to the user. -
Type the Windows Domain Account.
-
Type the New Password. If the New Password and Confirm fields do not match, a message is displayed:

If there is a problem with the password policy, violation message is displayed:

-
Retype the password to Confirm.
-
-
Click Mailbox section expander to display (or hide) the mailbox section's contents, and complete the following information:
-
-
Click Assign a new mailbox to open the Assign Mailbox dialog box.
-
Click the mail type.
-
Type the Display Name.
-
If you select Interaction Message Store, complete this information:
-
-
Click on the radio button to select the Storage Size. If Limit to: is selected, use the up and down arrows to set the size or type in the text box, and select the units from the drop-down box.

-
Click the radio button to select the Number of Messages. If Limit to: is selected, use the up and down arrows or type in the text box to set the number.
-
-
If you select Exchange, search for an existing Exchange mailbox.
-
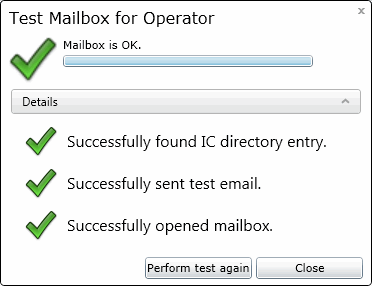
Click Test mailbox to open the mailbox test.
-
-
Click the Membership section expander to display (or hide) the membership section's contents, and complete the following information:
-
-
Click
 to open the Add Roles dialog box:

Select one or more roles in the Available items list, and click Add to add the role(s) to the Selected items list. You can also click Add all to add all roles. To filter the list of roles, type in the filter field above the list. Click to open the Add Workgroups dialog box:

Select one or more Workgroups in the Available items list, and click Add to add the workgroup(s) to the Selected items list. You can also click Add all to add all workgroups. To filter the list of workgroups, type in the filter field above the list.
-
-
Click the Security section expander to display (or hide) the security section's contents, and complete the following information:
-
If the user is a master administrator, select the Is a master administrator rights check box.
-
Note: Only a master administrator can select this check box. See the field descriptions for more information.
-
-
To allow the user to edit administrator rights, select the Can edit administrative rights check box.
-
To allow the user to edit access control rights, select the Can edit access control rights check box.
-
-
Click the Password Policies section expander to display (or hide) the password policies section's contents, and complete the following information:
-
Click
to open the Add Password Policies dialog box:
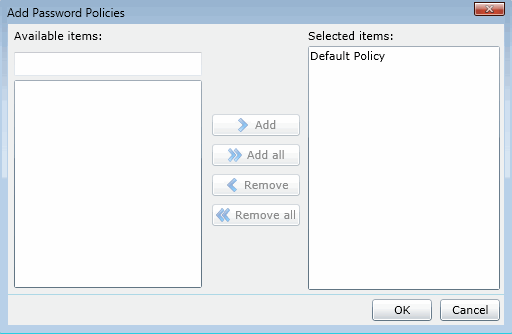
Select one or more Password Policies in the Available items list, and click Add to add the policy(s) to the Selected items list. You can also click Add all to add all policies. To filter the list of policies, type in the filter field above the list.
-
-
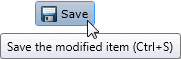
Save the new user or modified user.
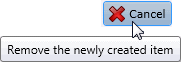
If necessary, the new user can be removed:
or changes made to an existing user can be reverted.

Related Topics