- Contents
Interaction Desktop Help
Add a Tracker Contact
Requirements: You need a Tracker Access license and the Add Individuals Security right to add a Tracker Contact. Other Interaction Tracker functions are available only if you have the appropriate licenses and security rights. For more information, see Tracker Licensing and Rights.
If the Contact Resolution process or your own search criteria cannot find the appropriate contact, you can create a contact. To add a contact to the Interaction Tracker database, you need a Tracker Access License and the appropriate Tracker Policy Security rights. For more information, see your CIC administrator.
Note: You can also use the interaction shortcut menu to Quick Add a Contact or you can use the Tracker menu to add a Tracker contact at any time.
To add a Tracker Contact:
-
Do one of the following:
-
If you are in the middle of the contact resolution process, select the current interaction and click the Contact Resolution down arrow. Select Add a Tracker Contact from the Contact Resolution drop-down list.
-
![]()
-
-
From the Tracker menu, select Add Contact.
-
![]()
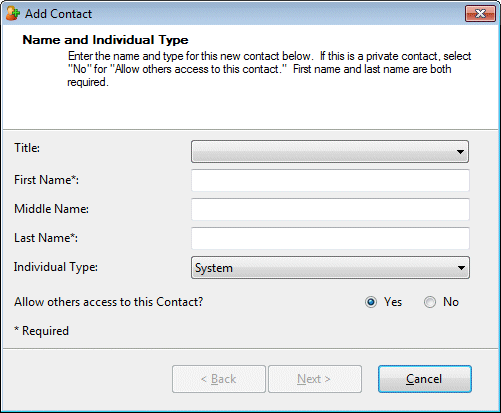
Result: The Add Contact Wizard appears.

-
In the Name and Individual Type view, complete the necessary information and then click Next.
|
Title |
Use the arrow to select a title from the drop-down list. |
|
First
Name |
Enter the contact’s first, middle, and last names in the appropriate text boxes. |
|
Individual Type |
Use the arrow to select a type from the drop-down list. Examples of contact types include System, IC User, External, Internal, Customer, Partner, Vendor, and Public Relations. |
|
Select Yes or No to control whether others can view or use this Contact information. Selecting No indicates that this contact is private. Rights: To indicate that a Tracker contact is private, you must have created the contact and have the Have Private Contacts Security right |
Result: The Organization page of the Add Contact Wizard appears.
![]()
- In the Organization text box, type all or part of the Organization’s name and press Enter or click the Search control next to this text box.
Result: The Organization drop-down list appears.

- Do one of the following:
-
If the Organization is already in the Tracker database, select it from the list.
-
If you think the organization is in the Tracker database, but does not appear in the list, select Advanced Search. Specify additional search criteria in the Find Organization Wizard. For more information, see Find a Tracker Organization.
-
Click Add New Organization to add this organization to the Tracker database.
-
Result: The Add Organization Wizard appears. For more information, see Add a Tracker Organization.
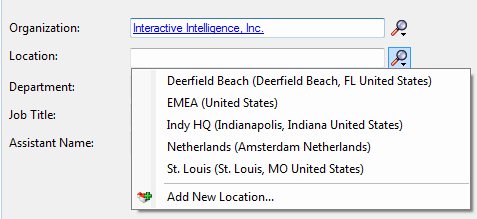
- In the Location text box, if an organization has more than one location, type all or part of the location name. Then press Enter or click the Search control next to this text box.
Tip: Display the entire list of Locations for this Organization by pressing Enter or clicking the Search control before typing anything in the Location text box.
Result: The Location drop-down list appears.

-
Do one of the following:
-
If the location is already in the Tracker database, select it from the list.
-
Click Add New Location to add a location for this organization to the Tracker database.
-
Result: The Add Location Wizard appears. For more information, see Add a Tracker Location.
-
Complete any or all of the remaining information and then click Next.
|
Department |
Type the name of the department to which this contact belongs. |
|
Job Title |
Type the contact’s job title. |
|
Assistant Name |
Type the name of this contact’s assistant. |
Result: The Business Contact Information page of the Add Contact Wizard appears.
![]()
-
In the Business Contact Information page, supply the business address, phone, and other information for this contact and then click Next.
Tip: You can type the name of any state or province in the State/Province text box or the name of any country in the Country text box. Click the Phone Number control to validate and format the phone number.
Result: The Addresses page of the Add Contact Wizard appears.
![]()
- Do one of the following:
-
-
If you have added all the necessary addresses for this contact, click Next > and skip the next step.
-
To update the business address information, click < Back and return to the previous step.
-
To add another address for this contact, click Add and go to the next step.
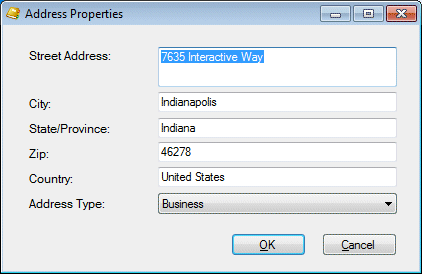
Result: The Address Properties dialog box appears.

-
- In the Address Properties dialog box, supply the information for this address. Use the arrow at the end of the Address Type drop-down list to identify the type of address. Click OK.
Note: Home, Shipping, and Billing are default Interaction Tracker address types. Your CIC administrator can define different or additional address types. If you have any questions about address types, see your administrator.
Click Add in the Addresses page and repeat this step for each address you want to add for this contact. After you finish supplying physical addresses for this contact, click Next > and continue to the next step.
Result: The Interaction Addresses page of the Add Contact Wizard appears.
![]()
-
In the Interaction Addresses page, do one of the following:
-
-
If you have added all the necessary addresses for this contact, click Next > and skip the next step.
-
To add another physical address, click < Back and click Add in the Addresses page.
-
To add an iAddress for this contact, click Add and go to the next step.
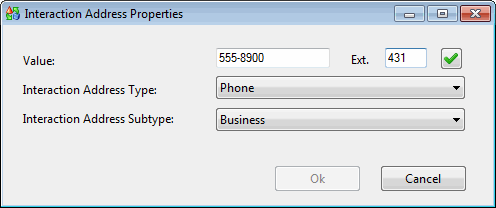
Result: The Interaction Address Properties dialog box appears.

-
-
In the Interaction Address Properties dialog box, enter the contact’s interaction address information and click OK.
|
Value |
Enter the phone number, email address, or other appropriate value, depending on which iAddress type you select. Tip: If you enter a phone number or fax number, click the Phone Number control to validate and format the phone number. |
|
Ext. |
Enter the extension number, if applicable. |
|
Interaction Address Type |
Use the arrow at the end of this drop-down list to select the type of iAddress you want to add. Note: An interaction address, or iAddress, is a media-specific, electronic address against which interactions take place. The type of address corresponds to the type of interaction: for example, calls or email messages among other supported interaction types. |
|
Interaction Address Subtype |
Use the arrow at the end of this drop-down list to select the iAddress subtype (Business, Business 2, Home, Home 2, Assistant, or Unclassified). |
Click Add in the Interaction Addresses page for each iAddress you want to add for this contact. After you finish supplying electronic addresses for this contact, click Next and continue to the next step.
Result: The Tracker Attributes page of the Add Contact Wizard appears.
![]()
-
In the Tracker Attributes page, supply values for the displayed Attribute Types and click Next.
Note: Interaction Tracker enables you to store attributes for contacts, organizations or locations. These attributes can include such information as personal characteristics, historical notes about a particular situation, or other significant details.
Result: The Summary page of the Add Contact Wizard appears.
![]()
-
In the Summary page, do one of the following:
-
-
Click < Back to return to the appropriate page and make corrections.
-
Review your entries and click Next to save this contact information.
-
Result: The "Add Contact Complete!" page appears.
![]()
-
In the Add Contact Complete! page, do one of the following:
-
-
Click Add another Contact. Return to the beginning of this procedure.
-
Click Finish to return to the CIC client.
-
Related Topics


